Posted on Sunday, November 04, 2007 by Lawny
Today i will show you how to add navigation links just below your blogs header like mine above and it depends what template you are using but it will fit most so always use a test blog before you apply it to your current blog as I'm not responsible if you mess your template up and there is lots of different styles you could have but I'm going to show you how to add a simple set of navigation links so first we need to copy the following CSS code
/* navigation links css code

----------------------------------------------- */

#topnav {

height:40px;

}

#topnav ul {

float:left;

width:100%;

padding:0;

margin:0;

list-style-type:none;

}

#topnav a {

padding:3px 7px 3px 7px;

float:left;

text-decoration:none;

color:#000;

margin:9px 10px 0 0;

}

#topnav a:hover {

color:#666;

}

#topnav li {

display:inline

}
Now paste it like i have done just below the closing skin tag

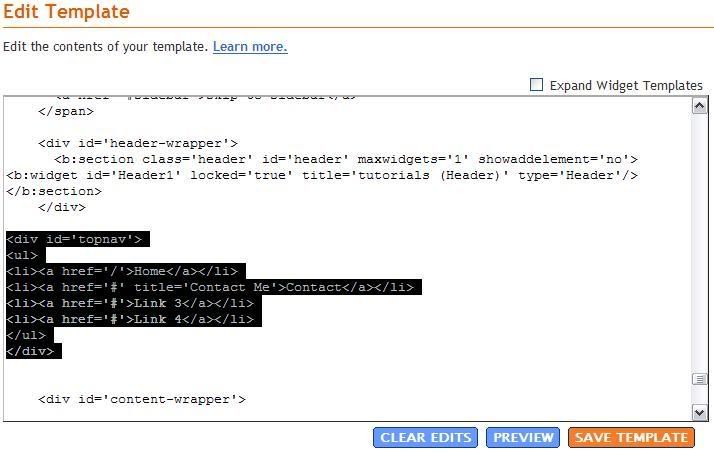
Now you need to copy the following XHTML code changing the red parts to where ever you are pointing your links to. The first part with the / points to your blogs homepage
and paste it just below the header closing div tag like I've done below

now if you preview your template you should see some links just below your blogs header like mine below

you can change parts of the CSS code to make different navigation styles you should make a test blog and play around with the CSS code to see what you can come up with this is just a simple one